
Key Takeaways
- Understand the J-1 visa categories and determine your eligibility.
- Find a designated sponsor and obtain the necessary Form DS-2019.
- Complete the required forms and pay associated fees.
- Prepare for and attend the visa interview at a U.S. embassy or consulate.
- Be aware of processing times and plan accordingly.
Applying for a J-1 visa can be challenging due to the numerous steps and the variety of required documents. However, by following a structured approach, you can increase your chances of a successful outcome. This comprehensive guide walks you through each critical phase of the application, from finding a sponsor to preparing for your visa interview. For more insights into the process, visit this J-1 visa guide, which breaks down the requirements and common pitfalls applicants face.
The J-1 visa is designed for individuals undertaking exchange programs in the United States, including students, interns, trainees, teachers, and researchers. Understanding the application process and documentation standards is crucial for avoiding delays, meeting deadlines, and ensuring compliance with U.S. immigration policies. Carefully planning and organizing your paperwork is essential for success.
J-1 visa applicants must also identify the correct category for their planned activity. Navigating these categories, from research scholars to interns or summer work travelers, requires close attention to detail, as each has unique eligibility and documentation requirements. Diligence in following instructions and meeting deadlines can mean the difference between approval and denial.
From finding a designated sponsor to attending your visa interview, this guide will help you handle each step confidently, reduce common errors, and increase your chances of a stress-free application process.
Understanding J-1 Visa Categories
The J-1 visa covers a range of exchange visitor programs, each with its own eligibility criteria and duration. Categories include interns, au pairs, camp counselors, teachers, research scholars, and more. Selecting the correct category is essential, as it determines the length and type of program you are allowed to join. Double-check your eligibility and determine which category aligns with your background and intended activities in the United States.
The U.S. Department of State provides a comprehensive overview of every J-1 category. Reviewing these details is helpful before beginning the application process. If you are still unsure, consult your prospective sponsor or the international student office at your school for tailored advice.
Finding a Designated Sponsor
Every J-1 applicant must first be accepted by a designated sponsor authorized by the U.S. Department of State. Sponsors serve as program administrators, monitoring compliance with regulations and issuing the crucial Form DS-2019. You can find a sponsor in the official database on the BridgeUSA website, which lists organizations by program type and location.
Be prepared to provide transcripts, proof of English proficiency, and financial documentation when seeking sponsorship. Each sponsor may have additional internal requirements or deadlines, so initiate this process as early as possible to avoid delays.
Obtaining Form DS-2019
Form DS-2019, the Certificate of Eligibility for Exchange Visitor Status, is fundamental to your application. This form verifies the details of your exchange program, including the start and end dates, your sponsor’s name, and an estimate of the funds you will need to support yourself in the United States. Review this form thoroughly for accuracy and notify your sponsor immediately if any corrections are needed.
Keep the original DS-2019 form secure, as you must present it during your visa interview and upon arrival in the United States. Incorrect or missing information can jeopardize your application, leading to processing delays or denial.
Paying the SEVIS Fee
The Student and Exchange Visitor Information System (SEVIS) fee, usually $220 for J-1 applicants, must be paid prior to your visa interview. Payment can be completed online. Save the confirmation receipt for your records and provide a printed copy at your interview. The SEVIS fee is non-refundable, even if your visa is ultimately denied.
Visit the SEVIS I-901 Fee processing website for step-by-step instructions on payment methods and acceptable forms of documentation. If you have questions about the SEVIS fee or the payment process, you can consult university resources or seek help from student services offices.
Completing Form DS-160
All J-1 applicants must complete Form DS-160, the Online Nonimmigrant Visa Application. The form collects crucial biographical information and details about your travel plans, U.S. contacts, and background. After completing the application, print the confirmation page and barcode, as they are required to proceed and schedule your interview appointment through the Consular Electronic Application Center (CEAC).
Answer every question accurately, as inconsistencies between your DS-160, DS-2019, and in-person answers can result in additional scrutiny or denial of your visa. Retain all submitted information for reference during the process.
Scheduling and Preparing for the Visa Interview
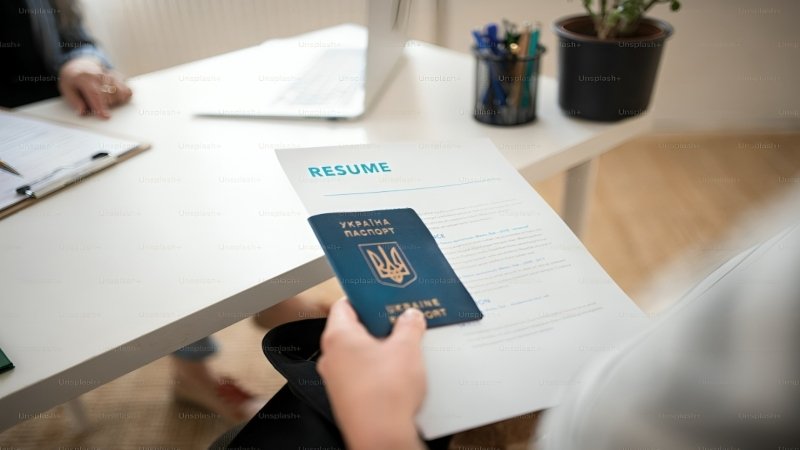
Book your interview with the nearest U.S. embassy or consulate as early as possible. Appointment wait times can vary significantly by location and during peak seasons. Prepare a comprehensive folder containing your valid passport, DS-2019 form, DS-160 confirmation page, SEVIS fee payment confirmation, visa fee receipt, financial evidence, proof of ties to your home country, and a properly formatted passport photo.
Bring supporting documentation that demonstrates your financial means to live and study or work during your program, along with proof of strong ties to your home country to establish that you intend to return.
Attending the Visa Interview
The consular officer will evaluate your application, verify your documents, and ask questions related to your background, program, and intent. Be clear, concise, and forthcoming in your answers. Consular officers look for evidence that you will respect visa regulations and return home after your program ends. Additional documentation may be requested during the interview, so keep extra copies of all your documents handy.
Understanding Processing Times and Next Steps
Processing times for the J-1 visa can differ by country, embassy workload, and season. Regularly track your application’s status and notify your sponsor of any significant delays. Once your visa is approved, your passport with the J-1 visa will be returned to you. Immediately after arrival in the U.S., check in with your sponsor and submit any required documentation, such as proof of entry. You must comply with all program guidelines and maintain active communication with your sponsor throughout your stay.
Find up-to-date guidelines and visa wait times on the U.S. Visa Information & Resources page maintained by the U.S. government.
Following the steps above will help set you up for success as a J-1 exchange visitor. Diligent organization and careful preparation are vital to ensuring a smooth application process and the realization of your goals in the United States.